Too many weeks ago, I was invited to Janne Abullarade’s home for a super duper special treat: homemade baklava.
Janne was born in El Salvador to Palestinian parents and has been living in Seattle for thirteen years, where she works as an AIDS researcher.
But she’s also arguably the most famous un-official baklava maker in the Arab community in Seattle.
Her baklava is found at almost every event and fundraiser. It fetches top dollar, with an individual piece going for $3 and a whole tray netting over $100.
When I caught up with her she was making two baklava trays for a United Palestinian Appeal fundraiser to raise scholarship money for women’s education in Palestine.
Janne makes the baklava and her husband, Christof, cuts it.

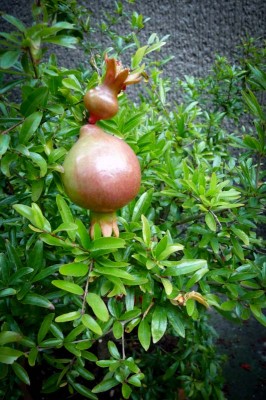
When I got to Janne’s home, she welcomed me at the door with her husband, his daughter, and big friendly dog. After offering me something to drink, Janne took me on a tour of her plants. She had a crown jewel gardenia, a Bollywood azalia, begonia plants, as well as pomegranates and fig trees.
“My father, when he moved from Beit Jala in Palestine to El Salvador, brought pomegranate seeds with him. So, we always had a tree in our home. Now, I have one too.”
After the plant tour, Janne had to start working on the baklava, since the trays were due in a few hours. Here’s how she did it:
What you’ll need for one tray of baklava:
- 12×16 inches metal trays (you can use glass, but metal is best)
- Brush to spread butter
Filling:
- 2x8oz bags pistachio (Janne’s mother uses chestnuts. Almonds or walnuts also are good choices. You can mix those too
- 2 Tablespoons sugar
- 1 Tablespoon cinnamon
- Fresh nutmeg (enough so you can smell it)
Assembly:
- 3x16oz packets fillo dough: it is best to get the thin papers (in Seattle you can find Apollo fillo)
- 1.5 cups butter
Syrup:
- 3 cups sugar
- 1.75 cups water
- 2 cinnamon sticks
- Juice of one lemon
Hint: If you have never used fillo dough before, make sure to have a lightly damp dish towel put it on top of the fillo dough so it can stay moist as you layer it.

Here’s what to do:
- Preheat oven to 350 degrees Fahrenheit
- Crush pistachio in food processor to the size of tiny pebbles. Try to make them all the same size, not too small because then the stuffing would fall out from between the fillo layers.
- Add sugar, cinnamon, and nutmeg and mix well
- Melt butter, make sure it does not boil
- The next part needs to happen somewhat quickly to avoid the drying out of the fillo dough.
- Use brush to spread the butter on the base of the tray
- Put first layer of fillo, then use brush to spread butter on all the sheet, make sure to get the edges as well
- Repeat the above step until you use 21 sheets of the fillo
- Spread the pistachio mix onto the fillo. Make sure you spread it equally
- Put another layer of fillo and repeat the layering process above, until you have 21 sheets of fillo
- Once done, get ready to cut the layers. This is a sensitive process and you need to be patient and slow doing it. Ready? Use a soft edge large knife
- To decide where to cut the fillo, put the tip of the knife at the bottom left edge of the tray as if you are measuring the length of the tray with the knife. Keep the end of the handle stationary. Rotate the knife so that the sharp edge is 45 degrees the the base. That is where you will make your first cut.
- Mark that first cut before you actually make the cut. Then mark parallel lines to that one at equal distances. Once done marking, then make the cut. Try being firm and slow while cutting.
- Once done with cutting the 45 degree cuts, mark the middle point on the tray on the short edge of the tray. Mark that one, then mark parallel ones to at equal distances. Once done marking, then make the cut.
- Bake the fillo for 45 mins.
- During the last 15 minutes of the fillo is baking, prepare the simple syrup
- Put the sugar, water, cinnamon, and lemon in a medium size saucepan on medium heat. Continue mixing until boiling and thick, about 5-10 minutes.
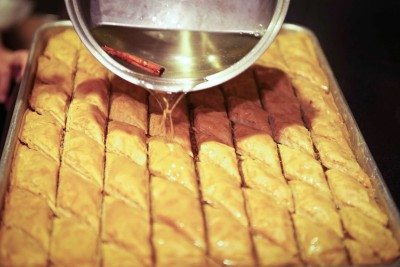
- When the baklava is done pour the hot syrup on the hot baklava. Pour it as evenly as possible using a spoon.
Let it cool, then enjoy!
You can make two layers of filling instead of one with the same ingredients if you’d like.

